Chewy double chocolate cookies

20160522_181813_Fotor

Life has been crazy recently! Labs have just taken over my life slightly and then also there is sun. As soon as the sun is out all I want to do in my free time (except for baking obviously) is be outside, go for strolls around the park, go for a nice cold pint in a pub and eat as much ice cream as I can. Even though I kept on baking over the last couple of weeks, I just didn’t have the time to blog about it.

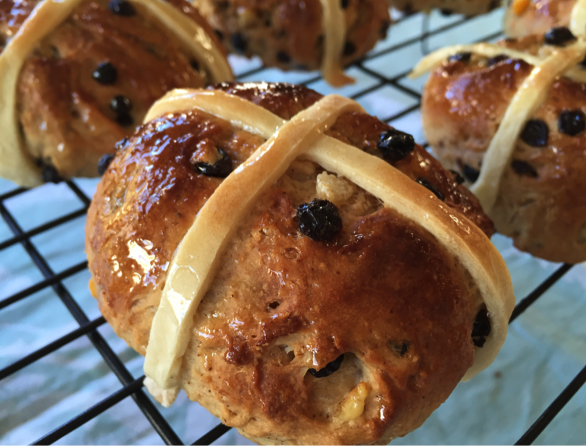
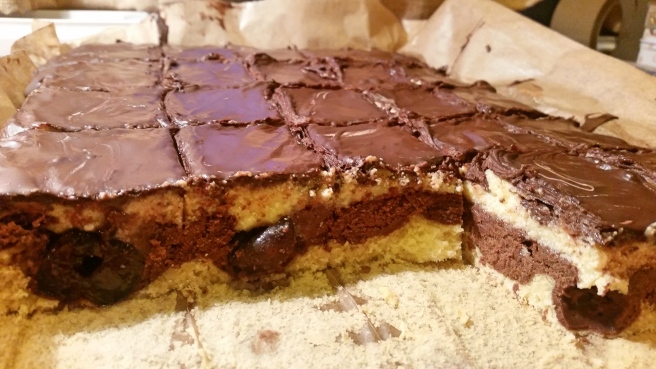
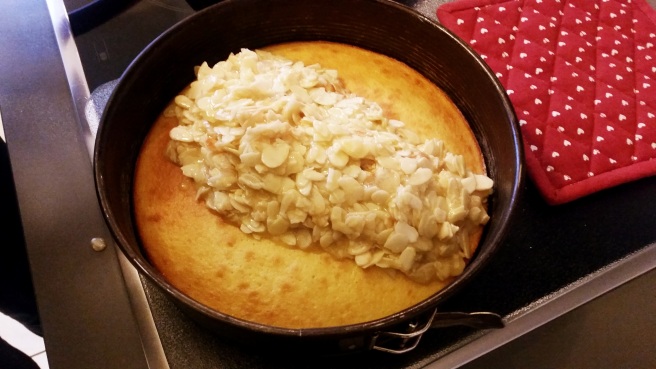
2 weeks ago, a friend and I baked for the Garden Party of our college in Oxford. We spend 2 nights and 1 morning in the kitchen baking, with always fun company, some banging 90s tunes and were surprisingly little stressed considering the amount of baking we did (check out those pictures of the baking).


But now I am back with a new blog post for ya! Last weekend, I really wanted some cookies- and rather than walking all the way to Tesco to buy some, I had all the ingredients I needed to make some chewy (and soft at the same time) double chocolate cookies. The cookies are super chocolatey and go very well with ice cream (especially on a warm summer day- just saying). And on top of that they are also very easy to make and not a lot of time effort (even better for a sunny day).

Preparing time: 15 minutes and 30 minutes chilling
Baking time: 12 minutes
Difficulty level: simple

Ingredients
250 g Butter
250 g white sugar
2 eggs
125 g cocoa powder
215 g flour
2 tsp. baking powder
150 g milk chocolate, cut into chunks
1 tsp. vanilla
pinch of salt

Mix the butter and sugar together until creamy. If you just gotten the butter out of the fridge, put it in the microwave for a couple of seconds to make your life easier. Then add the vanilla extract and salt. Add the eggs one by one and mix until you can see air bubbles forming.

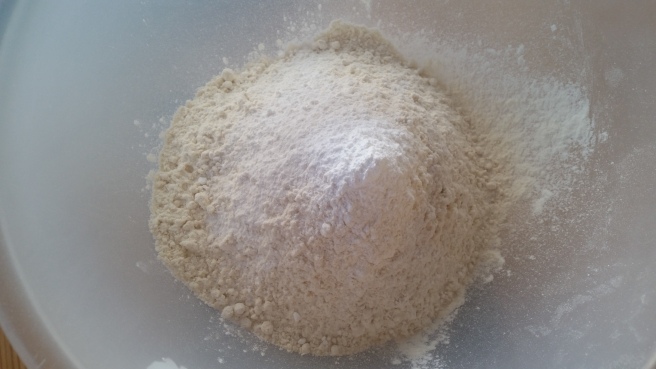
In a separate bowl, weigh out the flour, baking powder and cocoa powder. Add slowly to the butter mixture and mix carefully (if you turn on the mixer too high you will basically flour your whole kitchen- and who wants to clean that up right?!).

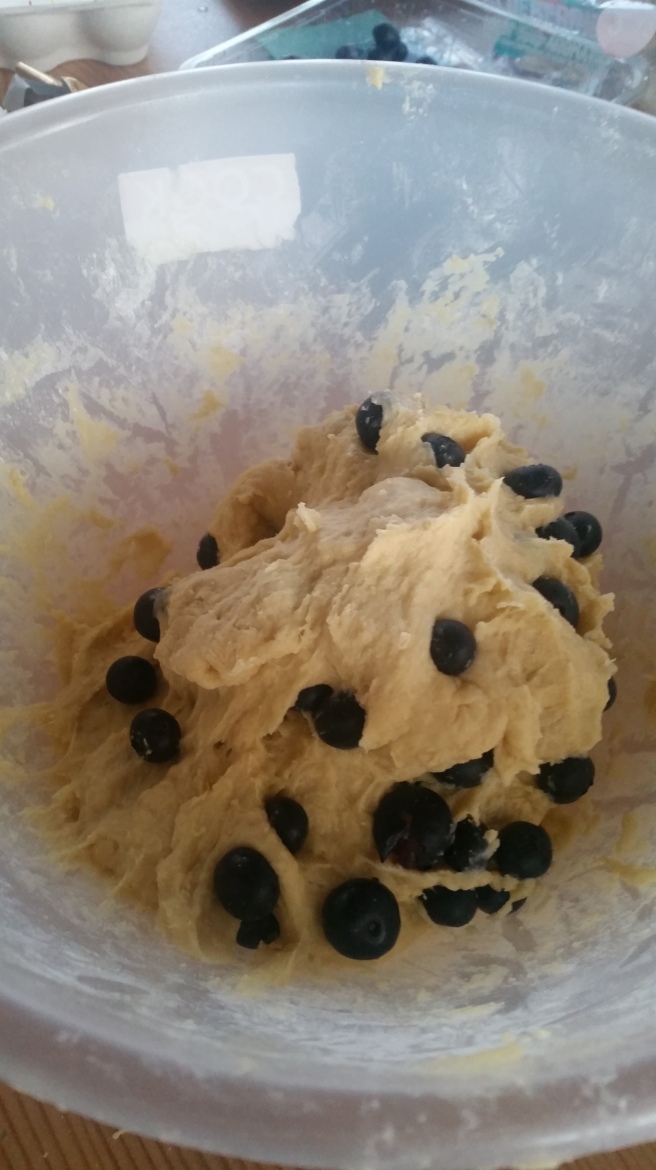
So once you added the flour mixture, chop the chocolate into small pieces and add. Now just use a spatula to fold in those chocolate chunks. The dough now has become quite sticky and it won’t be easy to mix. If you feel like you can hardly mix it, then just add a bit of milk.

Now chill the dough for about 30 minutes and either go and lie in the sun or watch some Netflix and drink tea (totally dependent on the weather of course).

Preheat the oven to 180 °C and take the dough out of the fridge and place baking paper (or if you ran out of it just like I did, butter the baking tray). Now, using your hands, form small balls out of the cookie dough and place them on the tray.

20160522_180829_Fotor

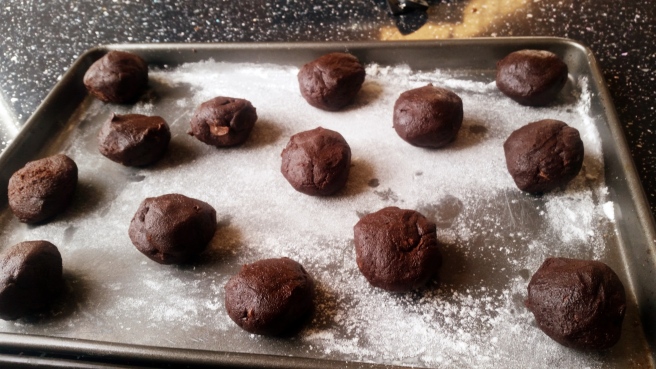
Bake the cookies for 12 minutes, they will still be quite soft by the time you take them out but that is exactly what you want.

Now go, enjoy them either warm or cold, with ice cream or caramel sauce – maybe even chocolate sauce?!

Hot Cross Buns

Untitled5

I know Easter has passed, but I asked a friend of mine to write a blog post about her making Hot Cross Buns. Hot Cross Buns are super popular in the UK for Easter and probably the thing that EVERYONE eats (I guess it is the equivalence to christmas pudding in importance). As I am not British and I have never made them before, when she told me she makes them every year I thought it would be great if she wrote a guest blog post. So I will post this now cause I really enjoyed reading her post and I will just re-post it next Easter ;-).

Here we go, this is Harriets post about the making of Hot Cross Buns. Enjoy!

In my family, we’ve always eaten hot cross buns for breakfast on Good Friday. A few years ago I decided to try making them myself, and it not being a complete disaster I’ve made them every year since. Despite being a big Mary Berry fan, I always use Delia Smith’s recipe. The only alteration is that I leave the buns to prove overnight, so that in the morning they are freshly baked for breakfast!

Preparation time: 30 minutes, 12 h resting
Baking time: 15-20 minutes
Difficulty level: simple

Ingredients:

450 g strong white flour
1 level tsp fine salt
4 level tsp. yeast
3 level tsp ground mixed spices
1 level tsp ground cinnamon
50 g golden caster sugar
110 g currants (I like pinhead)
50 g whole candied peel, chopped
50 g spreadable butter
150 ml hand-hot milk
75 ml hand-hot water
1 larger egg, beaten

For the crosses:
40 g plain flour
10 g spreadable butter

For the glace:
1 tbsp granulated sugar
2 tbsp water

To make the dough, first mix all of the dry ingredients together, and make a well in the centre. Then you can mix in the wet ingredients – I microwaved the butter so it was pretty much melted.

The next step is to leave the dough to rise, I left it overnight and in the morning it had about doubled in size, and was smelling good already!

Now pre-heat the oven to 180 °C. After dividing into 12 and leaving to rise again for about half an hour, it’s time to put the crosses on top. Before I made these I always wondered what they were made from – it’s actually a simple dough made from flour and water which is cut into strips. Then they are ready to go into the oven!

While the buns are in the oven, you can make the glaze by heating water together with granulated sugar. It’s important not to stir it, and that the sugar is completely dissolved to make a syrup – otherwise the sugar will recrystallize and make a white crust, which (speaking from experience) is not the most attractive look. Alternatively, you can use warmed up golden syrup, which is a bit easier. Brush the buns with the glaze while they are still hot, and once they’ve cooled down a little they will be ready to eat. Happy Easter!

Untitled5.png


Donauwelle

2016-03-11 06_Fotor16

Donauwelle is a German cake, originated from the black forest and it is one of my favourite German cake. Donauwelle translated means Danube wave and the name is due to the shape of the cake thanks to the addition of cherries. So let me explain what it is made of. You start off with vanilla dough, top that with chocolate dough and then put in some cherries. Baking it all together will cause the cherries to sink into the dough and creating a wave pattern. You then top it with German buttercream (slightly different to British and in my option a bit better cause it is creamy for cakes like this, for cupcakes I would still use British buttercream) and chocolate. Me and a friend from labs, the same person who taught me how to make the impossible flan, were quite keen on making this. She is going to Mexico for a month and wanted to learn a German cake, so we took this opportunity to bake some Donauwelle together. The next day, we took the cake to labs. It was a whole tray full for about 15 people, everyone really enjoyed it and ate one piece. Then I just left the cake in the common area and when I got back about 20 minutes later, the rest of the cake has disappeared except for the last piece (for some reason no one ever eats the last piece).
The recipe today is from my grandma. My grandma is amazing at baking and cooking and every time I come and visit she makes a cake or dessert but also makes some Donauwelle, just cause my sister and I love it very much. Normally, I don’t like cherries in cakes, but this is a big expectation.

Preparation time: 30 minutes
Baking time: 30 minutes
Difficulty level: simple

Ingredients
200 g sugar
250 g margarine
6 eggs
400 g flour
2 tsp baking powder
a pinch of salt
1 tsp vanilla extract
50 g cocoa powder
40 mL of milk

300 g cherries (I bought pitted cherries in a can)

Buttercream
1 Pkg. vanilla pudding powder
500 mL milk
250 g butter
50 g icing sugar

Chocolate glace
250 g dark chocolate
1 tsp oil

The first thing you got to do is to make the vanilla pudding. Vanilla pudding is an actual dessert in Germany, not like in the UK where they call desserts also pudding. The consistency is similar to custard.
2016-03-10 07_Fotor1
Off the 500 mL milk, add about 50 mL to the pudding powder and stir until the pudding powder is dissolved.
2016-03-10 07_Fotor2
Bring the rest of the milk to boil and stir while adding the dissolved pudding powder. Bring it back to boil for 1 minute and take off the heat.
2016-03-10 07_Fotor3
Leave to completely cool down and occasionally stir the mixture to prevent a skin to form on top. Put the butter next to the pot and allow to them to both reach room temperature.
Preheat the oven to 180 °C.
In the mean time, move on to the vanilla and chocolate sponge. Mix the sugar and margarine together and then add the eggs one by one while continues stirring. In a separate bowl, weigh out the flour, baking powder and salt and then add to the butter-sugar mixture in portions. Stir in the vanilla extract.
2016-03-10 18_Fotor6
Then take half of the dough and spread in a rectangular baking tin (covered in baking paper).
2016-03-10 19_Fotor9
Take the rest of the dough and add cocoa powder and milk.
2016-03-10 19_Fotor10
Stir well again. Now spread on top of the vanilla dough.
2016-03-10 19_Fotor7
Lastly, take the cherries and gently push into the dough.
2016-03-10 19_Fotor8
Put in the oven and bake for 30 minutes, check if any dough still sticks on the a dough tester after 30 minutes. Then allow to completely cool.

Once the pudding is cooled to room temperature you can make the butter cream. Start mixing the butter and add the icing sugar, then add the pudding little by little and continue mixing. And now taste it, it is always important to taste the butter cream (just cause it is so very delicious).

Once the cake is cooled, make sure it is completely cool, because otherwise the butter cream will melt away. Then spread the butter cream on top of the cake.


Then melt the chocolate over a water bath and add a little bit oil. Spread ontop of the butter cream and allow to cool.


The important thing is that once the chocolate starts to get harder, make sure to cut along the chocolate so that the next morning you just have to cut through the cake and won’t destroy the chocolate topping.
2016-03-11 06_Fotor17
Et voila, Donauwelle is ready to be served. Everyone who tried this cake was completely amazed so I hope you get the same reaction.

Simple New York Cheesecake

The last two months have just been crazy busy. Lab work has been keeping me rather busy and at the same time everyone’s birthday seems to be happening in January and February. I obviously couldn’t not not bake, but it also kept me even more busy. So when it got to the stage of having two birthdays on consecutive days, I decided I had to bake more time efficient (yes, that is so very German of me- I know). So, I made a massive KitKat cake (the blog for that will follow soon) and also wanted to make a New York Cheesecake. So I know that cheesecakes can be a bit of effort and taking very long to bake and require to be baked under steam (ie. sit in a water bath while baking) and all of that. However, as this sounded all rather tedious and not time efficient I found this other recipe that I slightly modified from bcc food that seemed like a pretty simple cheesecake. I was a bit worried, that if I rush this and take the easiest recipe, it wouldn’t turn out great, but I need to admit, this turned out to be one of the best cheesecakes I have made so far.

The major change I made is to incorporate some chocolate to the cheesecake by adding nutella to the cookie base.

Preparation time: 30 minutes
Baking time: 50 minutes
Difficulty level: simple

Ingredients:

200 g digestive biscuits
90 g butter

150 g nutella
900 g cream cheese (full-fat)
200 g sugar
200 mL sour cream
50 g flour
4 eggs
2 tsp vanilla extract

At first, add the digestive cookies into a plastic sealable bag. Seal it and then use a rolling pin in order to crush the cookies into really small pieces (actually probably more into a powder, floury consistency).


Then put in a blow. Melt the butter and the nutella together in a frying pan, the reason we warm up the nutella is that it makes it SO much easier to then mix with the cookies bits.


Add to the cookies and mix well. Then prepare a round baking tin, line it with baking paper (for cheesecakes with a cookie base I always feel like baking paper is better than just using butter and flour to grease the tin). Then add the cookie mixture to the baking tin and make sure you also press it against the wall as well as pressing it against the bottom. I quite like having the sides also covered in cookie base but if you don’t want to do that, just use 125 g digestive cookies.
2016-02-20 16_Fotor5
Now bake in the oven at 180 °C for 15 minutes and allow to cool. In that time, you can prepare the cream cheese filling.
It is very simple and straight forward. Add the cream cheese to a bowl, add the sugar and vanilla extract and a pinch of salt.
2016-02-20 16_Fotor6
Mix well. Then add the sour cream and 2 eggs at a time. Make sure you beat well and get a few air bubbles (but not too many as this might make it difficult to get a smooth surface later when baking). Then add the flour and quickly stir together. Now pour into the baking tin, when the cookie base has been cooled down.
2016-02-20 16_Fotor7
Bake at 160 °C for another 50 minutes. You do not need to cover the baking tin with kitchen foil nor do you require a water bath.

It always seems difficult to get the surface of the cheesecake without any cracks (especially the German cheesecake I introduced earlier in my blog). So the two things I normally do is, firstly using baking paper cause if the cake collapses slightly the baking paper will move with it and preventing cracks and secondly is to turn off the oven and leave the cake in there to allow it to slowly cool down. It worked very very well for this cheesecake and I did not get any cracks!
2016-02-22 08_Fotor
Then just remove from the baking tray. It is best stored in the fridge or a colder room in your house. Serve it with a simple chocolate sauce or straight up like this.

Enjoy!

Blueberry Scones

After a break from baking last weekend, I decided to go all out this week! So I compared two different blueberry scone recipes, to find out which one is my favourite (it also meant having twice the amount of blueberry scones which is just great anyways).

I never know how to pronounce scone correctly and if I say it one way, there is always one person to correct me. So either you pronounce it in a way that it rhymes with gone and the other one with tone. Depending on class and geographical area, the pronunciation varies. However, no matter how you pronounce scone, they taste amazing and are one of my favourite British baked goods. Scones are consumed with afternoon tea (even though, I can eat them at any point of the day really) and normally you top them with jam and clotted cream (some use double cream but clotted cream is the way forward!). The two most common scones are either plain or with dried fruits (mainly raisins), however blueberry scones are a variation I got from Cynthia Barcomi and from the baking blog madamechoufleuse.

In St Andrews, there is this great café (call North Point) who always had two different scones of the day, including blueberry scones or lemon and poppy seeds etc. showing that you can really vary those scones and make them even more special.

I really do love the blueberry scones from Cynthia, however I sometimes felt that they rose very differently and looked slightly different to the scones that you would get in a café. So my idea was to take a recipe for scones from Mary Berry and add some blueberries to them as well and then compare. At first I thought maybe the addition of blueberry will change the rising behaviour of the dough.

So, today I will talk you through the two different recipes.

Let’s start with the ones from Mary Berry 

Preparation time: 20 minutes
Baking time: 15 minutes
Difficulty level: simple

Ingredients:
450 g self-raising flour
2 tsp. baking powder
75 g butter
50 g sugar
2 eggs
220 mL milk
150 g Blueberries

Pre-heat the oven to 180 °C. Weigh out the dry ingredients, so sugar, baking powder and butter.
2016-02-14 16.31.39
If you don’t have self-raising flour, just add more baking powder. You can see that the baking powder is really important to get the rising level of the sonces. Then add the butter in small pieces and knead with your hands to give you a flaky mixture.


Then whisk the eggs until a foam layer has formed on top and mix in the milk. Now combine the dry and wet ingredients and you will get a rather sticky dough.

It is always better to work with a sticky dough for scones than a dry one but if you cant even get your hands out of it, add some more flour. At the end add the blueberries and knead carefully until combined.
2016-02-14 16.58.53
I am scared of rolling out the dough when blueberries are inside, as I don’t want them to pop, so I just form balls of the size between a tennis ball and a golf ball and them bake them. Before you bake them though, glaze the scones with some milk. This will get them the golden-brown finish. Now bake for 10 to 15 minutes (depending on the size of your sonces).

The second recipe is slightly different. This time, we will use buttermilk and some lemon juice and some zest. The ratio of sugar and flour also are different.

Blueberry scones according to Cynthia Barcomi

Ingredients

325 g flour
100 g sugar
1 tsp. baking powder
½ tsp. salt
90 g butter
2 eggs
60 mL butter milk
200 g fresh or frozen blueberries
Preheat the ove to 200 °C. Mix the eggs, butter milk and lemon zest together and put aside.
2016-02-14 17_Fotor.jpg
Then weigh out the flour, sugar, baking powder and salt and slowly add the butter. Again you will get a rather flaky and breadcrumb consistence of the dough before you add any liquids. Then add the liquids until the dough is just combing together. Then add the blueberries and knead carefully. Again, Cynthia does roll out the scones and cuts out pieces, but I just form balls again of the size between a tennis ball and a golf ball, glace them with milk again and bake them.

The results:
Both recipes are SUPER delicious and I would recommend both. However, the ones from Mary Berry are a bit drier and also rise better than the ones from Cynthia Barcomis.
2016-02-14 17.38.02
The Mary Berry scones look more like what you would get in a café here in the UK. And the addition of clotted cream and jam is definitely needed and makes them even more delicious.
The scones I made following Cynthai Barcomis recipe, rise slightly different (they also contain less baking powder, which is nice as some people pick up a distinctive taste of baking powder and don’t like it) and they are a bit more moist. The great thing here is that they are very enjoyable without clotted cream and jam, so I love eating them for breakfast. The shape however remains a bit more flat.

2016-02-14 18_Fotor2.jpg
Left: Cynthia Barcomi and Right: Mary Berry

So overall, I love blueberry scones and both recipes are great. It depends on you what you are looking for but all my friends enjoyed both scones and they got demolished within minutes of getting them out of the oven. So you can’t really go wrong with either. Adding blueberries or other flavours to scones is a great addition to your afternoon tea!

Enjoy.

2016-02-14 18_Fotor


Cinnamon Rolls

2016-01-23 17_Fotor0
Let’s move away from the decorative side of baking and just simply go for taste and simple this week! So on Tuesday, we actually got a day off labs- it was like a snow day you sometimes got in high school. So what do you do when labs are shut and you can’t work in your office? You go home and bake right? I mean this must be the natural response from everyone no? 😉
Well I went home and decided to bake for my research group, something simple and something that didn’t require me going food shopping. So I went for cinnamon rolls. Cinnamon rolls are based on a yeast dough and that is the hardest part of making them already. A lot shop bought cinnamon rolls, do not contain enough cinnamon in my opinion but are just drowned in icing (don’t get me wrong, I do love icing, but I mean cinnamon rolls do need a lot of cinnamon!) These cinnamon rolls are quite good and I actually baked them twice last week, simply as friends from halls felt I neglected them as only my lab group got some.

So let me introduce you to my favourite cinnamon roll recipe.

Preparation time: 30 minutes, 2 hours raising time
Baking time: 15 minutes
Difficulty level: simple

Ingredients:

200 mL Milk
75 g + 45 g butter
525 g flour
½ tsp. salt
50 g sugar
100 g light brown sugar
2 tbsp. cinnamon
1 egg
1 package dry fast yeast (7 g)
250 g icing sugar

For the yeast dough, warm up the milk and the butter together, get the butter to melt but do not bring the milk to boil!

2016-01-23 13_Fotor2

Then leave to cool until you can stick in your finger and it is warm but not hot. In the mean time, weigh out the flour, salt, and egg into a bowl. Now divide the flour to keep the egg and the milk later separate. In the part, where no egg is, place the yeast and then slowly add the warm (NOT hot, as otherwise you will kill the yeast) butter-milk mixture.


Now add the sugar on top of the milk-butter-yeast mixture which will activate the yeast. Just leave to stand for 10 minutes and you will see the yeast expanding and foaming.

2016-01-23 14_Fotor4
Then combine everything very well, either with a mixer, kitchen aid or with your hands (considering I am a student living in halls I just used my hands- and also it is a super workout for you!).
2016-01-23 14_Fotor
Now cover it with a damp kitchen towel and place in a warm room (close to the heating) and leave to rise until the dough almost doubled in volume (this will take anytime between 2 to 4 hours).

Now that the dough has risen, you can knead it again (and yes it will shrink again). Then take a rolling pin and roll out the yeast dough, preferentially into a rectangle. Be aware, this will yet be another workout for your arms (who really needs the gym when you can bake right?!), this will take a while and the thickness of it depends on how doughy you want the cinnamon rolls to be.
2016-01-23 16_Fotor
Now melt the butter, then add the sugar and the cinnamon. This will be a rather thick paste but perfect to spread.

2016-01-23 16_Fotor5
Cinnamon Spread

Then add on top of the yeast dough. Now roll up from the longer side and then cut into 2 to 3 cm long pieces.
2016-01-23 16_Fotor7

2016-01-23 16_Fotor8

2016-01-23 16_Fotor9
Then, in a round cake tin, add the cinnamon roll pieces and stick them rather close together (leaving some space in between). If you don’t do that, they will expand and become quite flat rather than a bit thicker.
Now bake for 15 minutes, until the cinnamon rolls are golden brown. Once taken them out of the oven, prepare the icing by adding little water to the icing sugar and making it a rather thick paste. Then cover the cinnamon rolls while they are still warm.
2016-01-23 17_Fotor0
You can either serve them straight away or keep them for a several days. They also make a great birthday treat cause you can stick a candle in the middle!

Toscakaka

Have you ever been in the situation where suddenly your parents, grandparents, family friends or friends called you up and wondered if they could stop by for coffee that day or the next one? And who would deny their parents etc. to come over? Obviously not. But than again, you also want to be able to offer some cake. Well today is your lucky day! This and next weeks blog post I will introduce a cake and cupcakes that you can do within hours and contain basic ingredients. So this week, I will introduce you to the so called Toscakaka. Let me explain how I got this recipe.

Less than a year ago, I discovered a baking book called “Scandilicious Baking” by Signe Johansen. A co-worker introduced me and the rest of the group to this swedish cake Toscakaka (kaka means cake in Swedish). It was amazing and the whole book is really good and interesting (especially if you have a cardamom addiction like I do, this is the perfect book for you). Let’s just say my mum and my sister also owe this baking book now as well (and no it wasn’t a last minute christmas present from me 😉 ).
I will introduce a few more of my favs later on but now back to the cake. Johansen describes the cake as a caramel almond-topped sponge but it is much more than that! Everyone who has tried this cake so far totally fell in love with it. It is the perfect combination of a moist sponge and a crispy topping.

Preparation time: 35 minutes
Baking time: 35 minutes
Difficulty level: simple

Ingredients

3 eggs
150 g caster sugar
½ tsp. vanilla extract
150 g plain flour
1 tsp. baking powder
¼ tsp. salt
75 g melted butter
75 mL butter milk

Praline
125 g butter
125 g light brown sugar
150 g flaked almonds
50 mL whole milk
¾-1 tsp fine sea salt
½ tsp vanilla extract

Preheat the oven to 150 °C if using fan (170°C otherwise).
Whisk the eggs together with the sugar and vanilla extract.
20151230_084021_Fotor
In a separate bowl, add flour, baking powder and salt. Mix the melted butter and butter milk and then in turns add the dry ingredients and the butter-milk mixture to the egg-mixture. Make sure everything is well mixed.
20151230_084824_Fotor
Now transfer the dough into a round baking tin (I normally use a 24 or 26 cm baking tin)
20151230_085323_Fotor
and bake until it is golden-brown which normally takes about 25 minutes.

You can start preparing the topping about 10 minutes into baking. Put all the ingredients stated above in a pan and bring the mixture to simmer.
20151230_090752_Fotor
Allow the mixture to simmer for a couple of minutes (it normally takes me about 5 minutes with an electric stove, while a gas stove requires about 3 to 4 minutes).
20151230_091238_Fotor
Then take the cake out of the oven and add the topping ontop of the cake.
20151230_091422_Fotor
Put back in the oven and bring up heat of the oven to 200 °C when using fan (220°C otherwise). Bake for another 10 minutes until the topping looks crispy and got an amber colour. Now allow to cool, after about 10 minutes, carefully cut along the sides to prevent the sides of the cake sticking to the baking tin. When it is completely cool, remove from the baking tin.
20151230_092804_Fotor

The impossible flan

DSC_0001
I have heard a lot of rumours about this so called “Impossible flan” and even got the recipe from one of my dad’s colleagues. I always wanted to try it but never got around to this – until a friend of mine told me she was going to bake it for an event and invited me to help her! Obviously I could not deny this offer and this is how the tale of the impossible flan began.

Flan is a rather unknown territory for me; however, I knew what it is based on a friends episode (The one with the two parties, where Rachel has to have two parties but only gets a birthday flan..). A typical flan is based on an egg-milk mixture, which is baked and then covered in some sort of caramel. The impossible flan varies slightly from the traditional flan (and I think it makes it also a lot better- simply because it contains chocolate). The impossible flan consists of three different parts (starting from the top) caramel, followed by flan followed by chocolate cake ( I KNOW RIGHT?!). The most interesting thing is that when you bake it, you put the chocolate cake in before the flan and during the baking process they supposingly swap around (craaazy). I am sure there is some sort of scientific explanation in the sense of change in density of the different mixtures? The flan should be denser than the cake mixture when baked so it should end up below the chocolate cake mixture. And now the impossible thing to do: turn the cake upside down when removing from the baking tray- lets see how that worked out for us.

For any Spanish speaking readers, here is the recipe that Karen and I used to make this Chocoflan.

Preparation time: 40 minutes
Baking time: 45 minutes
Difficulty level: medium

Ingredients

Chocolate cake
some sort of chocolate cake mixture (we took a Betty Crocker chocolate cake mixture)
3 eggs
120 mL vegetable oil
230 mL water

Flan
400 g evaporated milk (1 can)
400 g condensed milk (1 can)
4 eggs
125 g cream cheese
1 tsp. vanilla extract

Caramel
1 cup of sugar
2 tsp water

Pre heat the oven to 180 °C.
To face the challenge of the impossible flan- Karen and I came prepared- in our active wear.
IMG-20151126-WA0019
For anyone who has not seen this video yet definitely watch it, it will change the way you pronounced active wear as well as what you think of active wear!
So lets start baking (in our active wear, active wear..). Firstly, prepare the chocolate cake mixture.
DSC_0040_Fotor
Just follow the instruction at the back of the baking mixture, very simple and straight forward. Obviously as an alternative, here is an amazing chocolate cake recipe that you can make from scratch. Put the cake aside.
Next up, make the flan. Add all the ingredients into a bowl and mix until well combined and some air bubbles are released.
DSC_0046_Fotor
Then again put aside.

Before you start with the caramel, make sure you have your baking tin of choice ready- lined with either baking paper or with butter and flour.

For the caramel, add sugar to a pan and add the water. Now with a spatula stir the mixture.
DSC_0041_Fotor
It will turn into white lumps first and then slowly will caramelise. Be careful, you easily pass the nice-amber looking caramel to horrible smelling burned caramel!

Now assembly the cake! Put the hot caramel into the baking tin and make sure it covers all of the bottom and a bit a long the side (this you have to do fast). Then add the chocolate cake mixture- here you only need about half of the cake mixture (the whole will be too much, so you get a bit of extra cake on the side out of it, ideal for snacking). Then carefully pour the flan mixture into the baking tin. This will become messy and you see the chocolate cake and flan mixing, but by the end of the baking process, the flan should be below the chocolate cake layer.
IMG-20151126-WA0015_Fotor
Now bake for 40 to 45 minutes, and check with a knife if any of the flan batter is still on it. Once it is done, allow several hours to completely cool. Then remove from the tin and FLIP IT! Yes this is the impossible part, cause the flan is still a bit wonky, and this is quite difficult. But look at the result! It is amazing and tastes delicious! But be aware, you won’t be able to transport it by moving vehicle once you flipped it ;-).

DSC_0001

Apple and Walnut cake

DSCN0151_Fotor

I was trying to decide what to bake for as a next blog post and considering this weekend has been particularly busy, it had to be something that once it is in the oven it is done and didn’t need any sort of icing and decoration. I am sure you guys know by now that I do love apple and the combination of apple and cinnamon. Several years back, when I bought my first baking book in English (yes by several years I mean like 7 years ago…. ) I bought a Mary Berry’s baking book (not really knowing who she was to be honest- but there was no great british bake off so how should I know). Well anyways, I discovered this apple cinnamon cake which I like to call apple walnut cake, just cause walnuts are very important in this cake. My sister also is a very huge fan of this cake and she figured out that if you just about bake the cake (ie. to an extent where some doughy bits are still stuck on the cake taster) it is even BETTER. Furthermore, as my housemates just discovered, eating it hot straight out of the cake tin makes it the bestest. Seriously, I won’t lie, it might not look as beautiful as hoped, but I am here to deliver taste and for this cake, taste is much more important than anything else (and so worth it!).

So let’s get started:

Preparation time: 40 minutes
Baking time: 1-1 ½ hour
Difficulty level: simple

This is a slight adaption of the recipe found in the book. The reason is that I think you can never have enough apples in the cake. So rather than using 400 g of peeled and sliced apple, I use about 800g of apples. However, this will change the consistency of the cake slightly so it will make it a bit harder to serve, but it is again so worth it.

Ingredients:
350 g margarine
300 g dark muscovado sugar
4 eggs
150 g chopped walnuts
350 g flour
2 tsp. baking powder
800 g apples, peeled and chopped into pieces
½ tsp. cloves
1 tsp. cinnamon
½ tsp. nutmeg (optional)

Preheat the oven to 180°C. Cut the apples into pieces after you peeled them.

Apple peeling station

This can be a bit annoying and might take a while, unless you get a hand from one of your friends at college (as you can guess, that is what I had). It speeds up the process and you can have a nice chat while preparing the apples. Once you have the apples, depending on their tartness, you might need to add one or two tablespoons of sugar. Then add the spices and set aside.

ready to be eaten straight from the bowl (and for baking later)

Now combine the spreadable and sugar and mix until creamy. Add the eggs one by one and mix thoroughly.

Making the batter
Making the batter

Now add the flour and baking powder carefully and done is the dough already. In a baking tray (use a 28 cm tin if you can, I used a 26 cm baking tin and basically the cake was overflowing (I was prepared and had an extra baking tray at the bottom of the oven at least). Then add about 2/3 of the cake batter and top with walnuts. Now add as much of the apple mixture as you can. Add the last 1/3 of cake batter and top again with walnuts. Bake between an hour to an hour and a half, depending on how chewy you want the cake to be.
DSCN0151_FotorNow, get some vanilla ice cream and just enjoy the cake! And don’t forget to share it with your friends (even though Joey doesn’t share food- I know!)

Not the most beautiful cake but taste-wise it is amazballs

Käskuchen (German Cheesecake)

German cheesecake
German cheesecake

I am a big fan of cheesecake- German and American cheesecake, however they are very different in taste and texture. Today, I will focus on the German version. The main difference is that German cheesecake does not make use of cream cheese, however it makes use of Quark. Until a couple of years ago, getting Quark abroad was quite difficult and sometimes the name Quark was used for cottage cheese, which, at least in Germany, are two very different products and all the Germans out there reading this blog entry can imagine that using cottage cheese instead of Quark will not result in a very pleasant cheesecake. However, this year I discovered Quark in Tesco (even in Tesco express and not just in the big ones). Quark is a dairy product and has a creamy and thick texture.
In Germany, Quark can be eaten sweet or salty. For example, a very simple savoury dip is a leek-chive-quark dip. On the other hand, a very popular dessert for the summer is Quark with fresh fruit and just a small amount of sugar.

Now after this short, educational detour, let’s bring the focus back to the cheesecake.

I have tried making cheesecake the first time for mother’s day several years back (and by several I probably mean 10 years…). The fun thing about the German cheesecake is that while it bakes, the quark-mixture rises steadily and gets higher and higher. So the day I baked it, I had my grandma’s number on speed dial (as this is her recipe). A friend of mine was also there and we anxiously watched the cake becoming bigger and bigger. So we thought the cake will totally explode in the oven. Dreading the mess I would have to clean, I called my grandma every 5 minutes in panic asking what to do- well it turns out, this is just how a German cheesecake bakes, so there was nothing to worry, but ya know I did anyways. So let this be a hint, do not panic at any point when baking a cheesecake- it is most probably normal. Later, I will show a few picture of how the cake rises during baking.

Preparation: 30 minutes
Baking time: 90 minutes
Difficulty level: simple

Ingredients:

For the base:

75 g butter
50 g sugar
1 egg
175 g flour
1 tsp. baking powder

Filling:
100 g butter
300 g sugar
4 eggs

2 Pkg. vanille pudding powder (Dr. Oetker normally sells it)
500 g low-fat Quark (Magerquark in German)
500 g 40 % Quark (for anyone living abroad and not being able to find different form of Quark, just take the one you can find)
400 mL double cream

The best way to make the base is to it on the counter rather than a mixing bowl. Mix the flour, baking powder and sugar and add butter flakes.

Dry ingredients and mixture

Knead the ingredients together and make a mould for the egg. Now add the egg.

Mould for the egg
Mould for the egg

This will turn into a crumbly dough and put in the fridge to chill.

Ready dough
Ready dough

Preheat the oven to 175 °C, if using fan reduce heat to 165 °C.

For the filling, cream the butter and sugar together with an electric mixer. Slowly add the four eggs to the mixture and add the vanilla pudding powder.

Vanilla pudding powder from Dr. Oetker

Now, do not use an electric mixer anymore, but use a whisk.

Adding Quark/ heavy cream

The addition of the Quark and heavy cream will be very messy (ie. splashes everywhere) if using an electric mixer. Carefully add the Quark and heavy cream.

Take out the dough from the fridge and roll out for a round baking tray (diameter 28 cm). Make sure you get a little bit dough along the walls of the baking tray. You do not have to prebake the base!

Dough spread out in the baking tray

Add the filling and carefully put the baking tray in the oven.

Ready to bake!
Ready to bake!

There are a few simple rules that you should follow:
1. Do not open the oven while the cake is still baking
2. When the cake is done, just turn off the oven but leave the cake to cool in the oven (preferentially overnight).

Short break: The baking process (in height). I had to take the pictures with a CLOSED oven, so that made it a bit harder but I think you can see why I panicked a bit, especially when comparing the first and last picture.

At the start
At the start
Half way through
Half way through
Towards the end
Towards the end

You can see how the cake rose very high, however it normally collapses when it is cooling down.

Ready to eat
Ready to eat

And this is it! The cut always happens when I bake a cheesecake but I investigated ways to prevent it (apparently taking it out after it baked for a few minutes and cutting along the edges), but I still have to try that out. But I like the cut, it kinda reminds me of the Harry Potter scar no?
Anyways, the German Cheesecake is a very simple cake, my mum always likes to say: once it is in the oven, it is done, there is nothing else to worry about (and if you ignore my long intro, you can totally see how little description the baking process needs)